Hybrid Classrooms: Getting Started
CUIT has equipped many of Columbia's classrooms with video cameras and microphones to create hybrid learning environments that can accommodate both in-person and virtual students ("HyFlex Classrooms").
Classrooms with our high-function Crestron AV systems typically have a touch panel mounted to the wall or on the classroom podium. The touch panel is the centralized control system that can switch between video and audio sources, as well as control the video cameras and microphones (if applicable). Host your Zoom sessions from the podium computer to connect to these AV sources automatically.
Getting Started Checklist
Check the following settings before beginning class:
1. If the system is off when you walk in the classroom, touch the Crestron touch panel to turn on all the devices (on the podium or mounted on the wall).
2. Log in to the podium computer by selecting Other User in the lower-left corner and using your UNI/password.
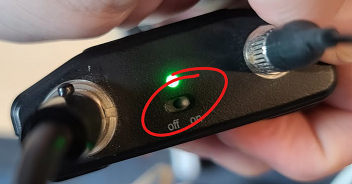
3. Take out the lapel microphone from the podium drawer and plug it into the transmitter, then turn it on with the on/off switch. Ideal audio levels are achieved when the mic is one fist’s distance away from your mouth
- Microphones may always be on in the room, even if your lapel mic is off. If there are ceiling mics, they can pick up audio, so speak with care. Assume all participants can hear you when your Zoom class is in session.
4. Begin the Zoom session from the podium computer so you can use the room's cameras and microphones. Do not host the Zoom session from your laptop or tablet (you can join with your tablet as a participant later).
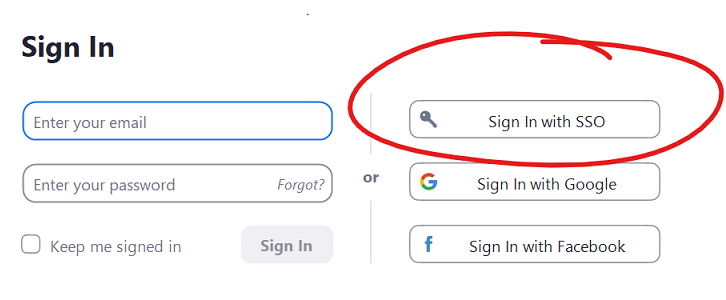
- Double-click on the Zoom shortcut on the podium computer's desktop. Click the Sign on with SSO option. The company domain is columbiauniversity.zoom.us. Log in with your UNI/password.
- To ensure you start the correct Zoom session, log in to CourseWorks and click on the Zoom Class Session button on your class page.
- Choose the Join with Computer audio option (microphone and speaker should both be on “Realtek audio”.)
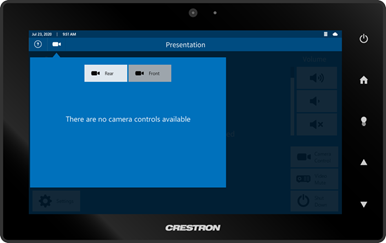
- If your video doesn't start automatically, select Start Video in the bottom-left corner of the Zoom controls. Adjust the camera angles with the Camera Control button on the touch panel on the wall or the podium. Note that some classrooms do not have multiple angles.
- If you have a tablet to share screen from, connect to Zoom from the podium first, then join with your tablet as a participant. *Important* Joining as a participant with your laptop will automatically log you out from the podium computer!
6. To raise / lower the projector screen, either do it manually or if there are buttons to the left or right of the screen, press “up” for mechanical operation. Use the Projector mute button on the touch panel if you don’t want any content projecting (useful if you have no in-person participants).
7. Ensure that the volume is high enough so you can hear your students when they speak. (Controlled via Volume on touch panel.)
8. Select Share Screen in Zoom's bottom control pane to share materials.
9. Select Gallery View in the upper-right corner of Zoom if you want to see an array of all the remote participants.
10. When class begins, select Record from Zoom's bottom control pane if it hasn’t started automatically.
After-class Checklist
1. Turn off the lapel microphone and leave it in the podium drawer.
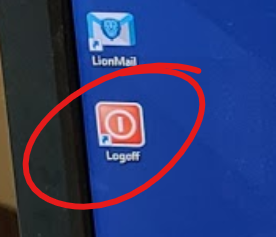
2. Log out of your session with the Logoff shortcut on the podium computer desktop.
3. Touch the shut down button on the touch panel to turn everything off.
Helpful Hints
- If you’d like to annotate slides / drawings, use a tablet (such as an iPad). Join your Zoom session directly from your tablet, and then share screen with class. Mobile devices won’t log you out of your podium computer Zoom session, but signing on to zoom on another computer (such as your laptop) will log you out of your podium computer session. The best practice is to use a mobile device like a tablet. Be sure to mute the audio on your secondary device to prevent audio feedback.
- If your video is backwards (the text you write appears mirrored and participants can’t read it), you need to change the settings:
- Click the upward arrow next to video ^
- Click Video settings
- Uncheck the Mirror my video checkbox
Seminar/Discussion-based class recommendations
- Select Gallery View in the upper-right corner of Zoom to see an array of all the remote participants.
- Select Front camera (if available) to display a view of the classroom facing away from the podium
Lecture-based class recommendations
- Select Share Screen in Zoom's bottom control pane to share materials.
- Select Rear camera and one of the following presets:
- Podium or Lectern preset: Camera zooms in on the podium/lectern
- Rear camera + Front preset: Camera displays everything at the front of the room: black/whiteboard, lectern, and a bit extra on the sides
- Rear camera+ Blackboard preset: Rear camera / blackboard angle (camera zooms in on just the blackboard)
Fully-virtual (no in-person students) class recommendations
- Use the Projector mute button on the touch panel to stop content from projecting in the empty room.
- Select Rear camera and one of the following presets:
- Podium or Lectern preset: Camera zooms in on the podium/lectern
- Rear camera+ Blackboard preset: Rear camera / blackboard angle (camera zooms in on just the blackboard)
How to change the camera angle
1. Locate the touch panel in the room. It may be mounted to the wall or located on the podium.
2. You should be greeted with the following screen (if screen is black, touch the screen to wake it up):
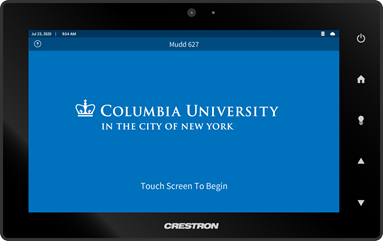
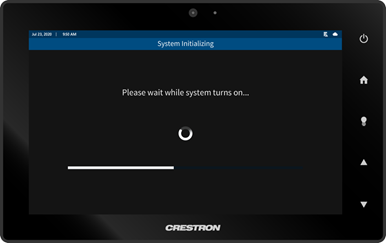
3. Touch the screen to begin the system start-up sequence.
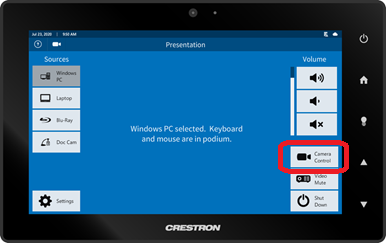
4. Select Camera Control in the right-hand panel.
5. From here, you can select between cameras (if applicable), and choose the camera position preset.
Possible camera angles include:
- Rear camera + Podium or Lectern preset: Camera zooms in on the podium/lectern
- Rear camera + Front preset: Camera displays everything at the front of the room: black/whiteboard, lectern, and a bit extra on the sides
- Rear camera+ Blackboard preset: Rear camera / blackboard angle (camera zooms in on just the blackboard)
- In larger rooms there may also be a B-Board L (left blackboard) and B-Board R (right blackboard) options
- Front camera: A view of the classroom facing away from the podium; useful for promoting in-class participation during discussion
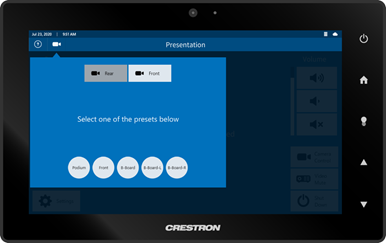
*Note* Some cameras do not have preset options:
